Part 1: Essential Tips for Cotton Doll Face Design
So, you’re ready to design your own cotton doll? That’s awesome! This article is the first chapter of our complete Custom Doll Guide.
But before you grab your stylus or pencil, we need to talk about the medium you're working with: Embroidery.
Many beginners approach doll design like a digital illustration or a painting. While that looks great on screen, it can cause major headaches when the factory tries to turn it into a real product. Let's dive into the core principles of embroidery so your design comes out looking exactly how you imagined.
Why Embroidery is NOT Drawing
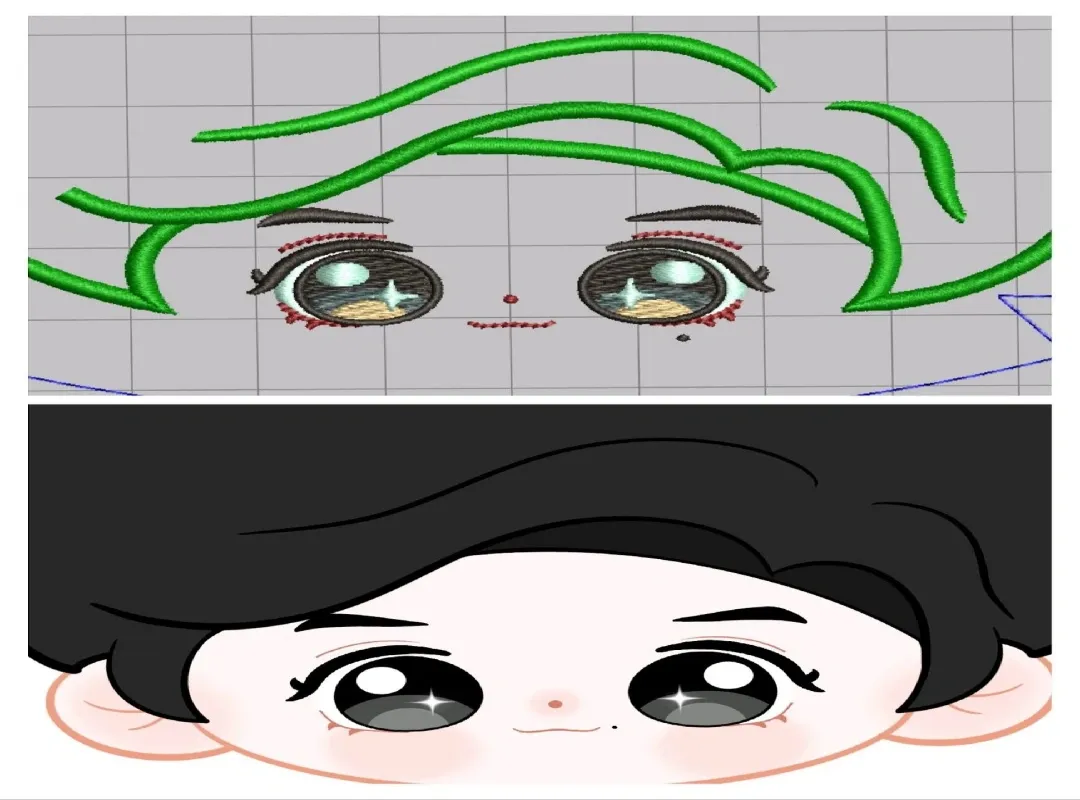
Here’s the thing: Embroidery isn’t flat. Unlike a pen stroke, an embroidery stitch has actual width, texture, and thickness.
If you draw a super thin, delicate line in your draft, the embroidery machine will likely stitch it thicker than you expect. This can change a doll's expression entirely—making a subtle smile look clunky or "off."
The "Golden Rule" of Colors
We all love colorful designs, but embroidery machines have limits. Most factories work with a 9-color limit per face. (Some can push it to 12, but that’s rare and pricey!).
Why does this matter?
- Cost: More colors = more thread changes = higher cost.
- Risk: Complex color palettes increase the chance of "sampling failure" (where the doll looks nothing like the drawing).
- Consistency: Sticking to fewer colors ensures your production batch looks uniform.
How to "Factory-Proof" Your Design
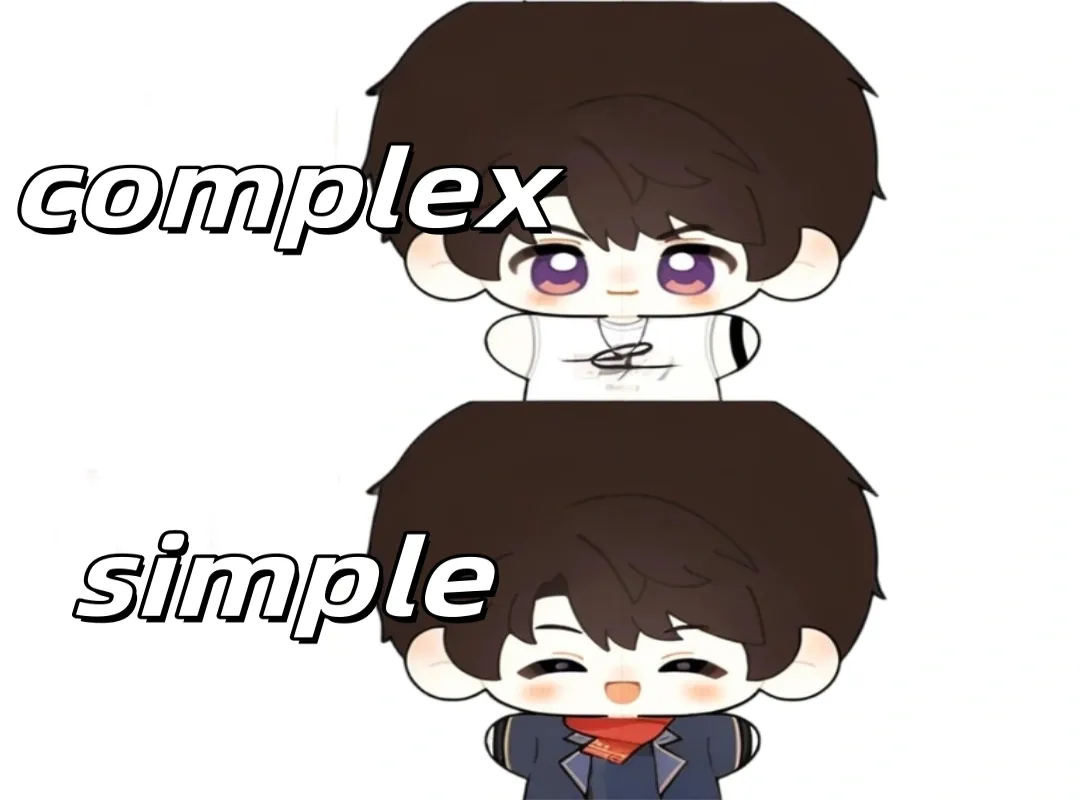
Want to ensure your design sails through production without rejection? Keep it bold and simple. Here is your cheat sheet:
1. Bold Shapes Win
Embroidery machines aren't great at tiny, microscopic details. Keep facial features (eyes, nose, mouth) defined and bold. Avoid intricate, lace-like patterns on the face—they often get lost or look messy when stitched.
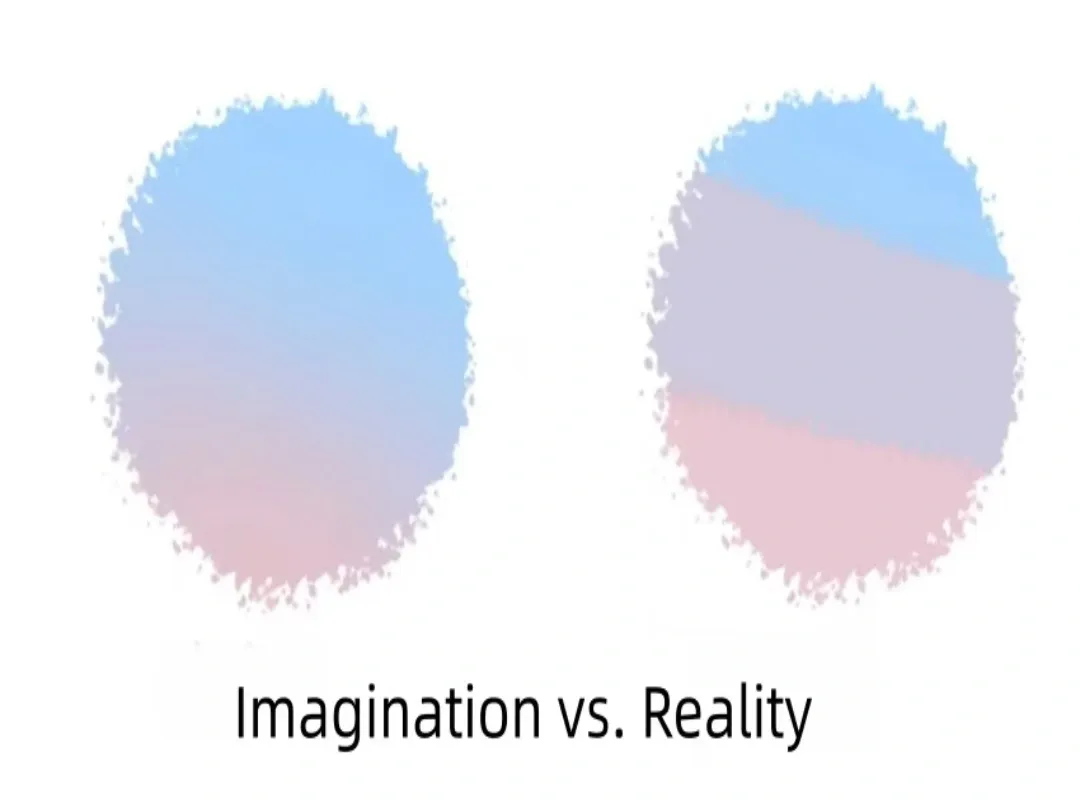
2. Say Goodbye to Gradients
This is the #1 mistake we see. Embroidery cannot do smooth gradients. If you try to fade a blush from pink to white, the machine has to use "dithering" (mixing dots of color), which often looks messy or pixelated on a doll face.
The Fix: Use solid blocks of color instead. It looks cleaner, professional, and much cuter in plush form.
3. Mind the Stitch Direction
Thread has a "grain," just like wood. The direction the thread is stitched affects how light hits it. Long stitches look great for bangs or hair, but on small eyes, they might warp the shape. Trust your factory's expertise here, but keep in mind that thread direction adds a 3D effect!
Watch Out for These Traps!
Even pros make mistakes. Here are a few quick checks before you submit your file:
- The "Crowded" Face: Don't put the eyes and nose too close together. Embroidery adds bulk, and if they overlap, it creates a hard lump.
- Thread Tension: If your design has too much density, it can pucker the fabric (make it wrinkle).
- Screen vs. Reality: Thread colors never match your screen 100%. Always, always ask for a physical sample photo!
Next Step: Now that you've got the basics, let's look at what not to do. Head over to Part 2: Common Design Mistakes to Avoid.